How do I use EyeTV for iPad?
Setting up EyeTV for iPad
First, make sure you are using EyeTV 3.4 (or later) on your Mac.
Then, install the EyeTV for iPad app from the iTunes store.
Visit the iPhone section of the EyeTV Preferences, and turn on Enable access from EyeTV for iPhone/iPad.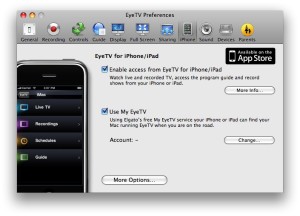
If you would like to use EyeTV for iPad outside of your home network, then you should sign up for an My EyeTV account. See this article for more information:
Using EyeTV for iPad
Once you log in to your Mac via the EyeTV for iPad app, you’ll see a main menu on the top left that includes 4 sections: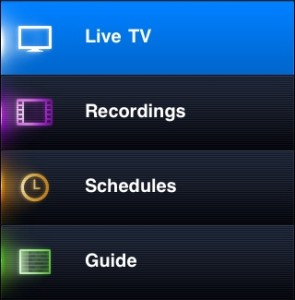
1) Live TV – Watch Live TV via an EyeTV compatible hardware device that is connected to your Mac.
2) Recordings – Watch completed recordings on your Mac, after they are prepared for iPhone/iPad Access.
3) Schedules – View and create scheduled recordings that will happen on your Mac, now or in the future.
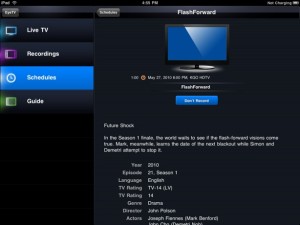
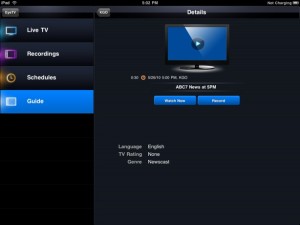
4) Guide – Browse your Program Guide, and select shows to record.
Select each section to see more options, which are covered below.
EyeTV for iPad – Live TV
After selecting the Live TV selection, you will first be presented with any Favorite Channels Lists that you’ve made in EyeTV. Such lists can aid in navigation on your iPad – make different lists for different viewing habits, like one just for News channels.
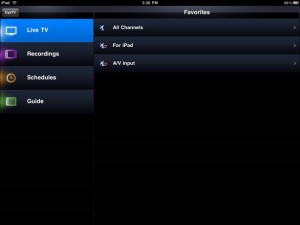
If you select one of these Favorites, then you’ll be presented with a subset of your complete channel list
You can choose the A/V Input option, if you want access Composite Video, S-Video, or Component Video inputs. This option will only work if your EyeTV hardware supports those inputs.
If you don’t have any Favorites, then you’ll be given the complete list of all available channels.

Channels are listed in numerical order. The name of the channels are shown, along with the Program Guide information about the current and upcoming programs.
Press the name of the channel to start watching Live TV.
Press the green Guide icon to see the Program Guide information for that channel.
Press the gear/wheel icon at the top right corner of the screen to adjust the Live TV Settings.
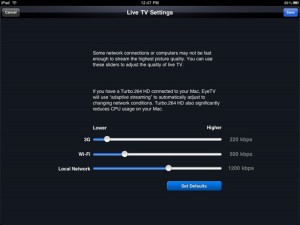
Some network connections or computers may not be fast enough to stream the highest picture quality. You can use the sliders in this window to adjust the quality of live TV.
It will take a few seconds for the video stream to be prepared. This process can be aided by the use of Turbo.264 HD, if it’s connected to your Mac. Turbo.264 HD allows for adaptive streaming, which will automatically adjust the quality as needed (depending on the speed of your internet connection).
Once the video is prepared on your Mac, then it will be streamed to your iPad. This happens during the “Loading Movie” process.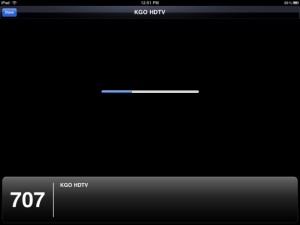
After a few more seconds, you will see the TV image. Due to the streaming process, this image may be 15-30 seconds behind the live signal.
Tap on the screen to bring up the controls. Tap again to hide them.

The icons at the bottom of this window allow for the following:
• 30 in circle – Skip back 30 seconds (when available)
• Two Lines – Pause (will turn to Play symbol while paused)
• Jump – Moves to the most recent section of video (Live).
• Blue Bar – Controls the volume.
Double-tap to make the image larger. Or, use the icon with the two arrows, at the top right corner of the screen.
When you’re finished watching, press Done.
To change the channel, press Done then select a new channel from the Live TV section, or the Guide.
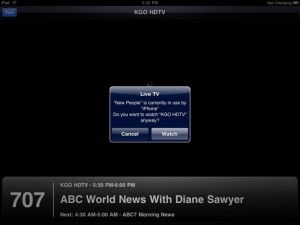
If another iPad or iPhone is accessing your Mac, at the same time that you try to connect to Live TV, then you will be offered an option to take control. Press the Watch button to take over the Live TV stream from the other device.
EyeTV for iPad – Recordings
After selecting the Recordings selection, you will first be presented with any Playlists that you’ve made in EyeTV. Such lists can aid in navigation on your iPad – make different lists for different viewing habits, like one just for News channels.
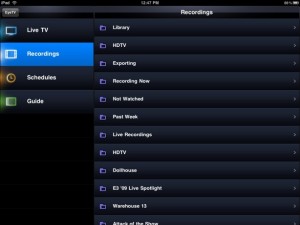
If you select one of these Playlists, then you’ll be presented with a subset of your complete library.
If you don’t have any Playlists, then you’ll be given the complete list of all available recordings.
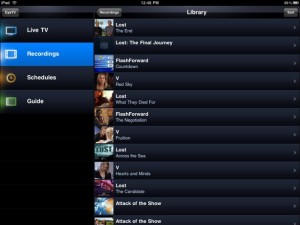
Press the Sort button at the top right corner of the window to choose how your recordings are presented. Select your option, and the sort order will immediately change.
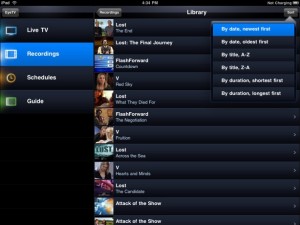
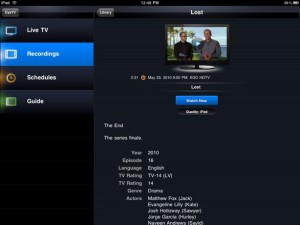
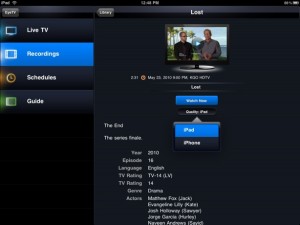
All recordings will appear in the list, but only recordings prepared for iPhone/iPad Access will be playable, via a Watch Now button.

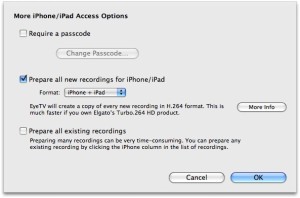
You can also set a passcode, without which EyeTV will not be accessible via any iPad.
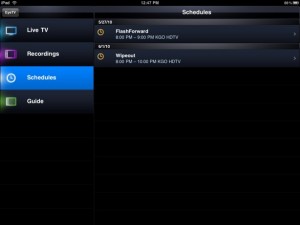
EyeTV for iPad – Schedules
After selecting the Schedules selection, you will see a list of all schedules present in EyeTV, sorted by date.
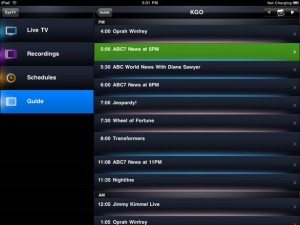
EyeTV for iPad – Guide
After selecting the Guide selection, you will first be presented with any Favorite Channels Lists that you’ve made in EyeTV. Such lists can aid in navigation on your iPhone – make different lists for different viewing habits, like one just for News channels.
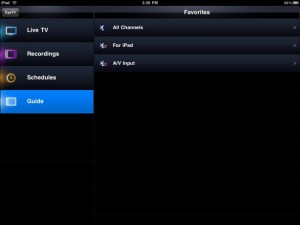
If you select one of these Favorites, then you’ll be presented with a subset of your complete Program Guide.
If you don’t have any Favorites, then you’ll be given the complete Program Guide for all available channels.
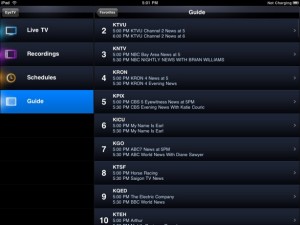
Select a Channel, and you will see all programs scheduled on that day, starting now. The current program will be colored green.
You can change the date by using the arrows at the top right corner of the window.
You can move to the next or previous channel in the Guide, by using your finger to swipe the Guide window left or right. Or, press the Guide button at the top left corner of the list to see the complete Guide channel list again.
Troubleshooting EyeTV for iPad
If you have a specific problem with EyeTV for iPad , check to see if your issue is covered by the following articles:
In Your Local Network:
In general, no further configuration should be necessary when using EyeTV for iPad in your local network.
Using EyeTV for iPad with the Mac OS X Firewall
Could not get guide data
Improve Wi-Fi performance by disabling Bluetooth
From Outside Your Local Network:
When outside your local network, the free My EyeTV service can automatically connect the EyeTV app to your Mac back home, as long as your internet router supports UPnP or NAT-PMP protocols (the same protocols used by Apple’s “Back to My Mac” feature.) If your router does not support those protocols, you will need to manually configure it to forward port 2170.
Double NAT
TV Guide and My EyeTV Accounts
Documentation & Setup:
Accessing EyeTV via a web browser
How do I find my Mac using EyeTV for iPhone?